How to properly aerate wort for brewing
While in some ways beer brewing is simply following a recipe but it sure is not like making a cake. There are some many variables at play.
Is the yeast viable?
How much hops do I need to add?
Is my equipment germ-free?
Is the temperature correct?
And on and on.
There's also one more variable that sometimes gets overlooked in the brewing and bottling processes and that's the role that oxygen plays in fermentation.
Oxygen supports yeast growth and effectively then has an influence on the ABV of one's beer so understanding the best way to manage this element will help improve your beer drinking experience.
First up, let's discuss the:
The relationship between yeast and oxygen
Good oxygen levels promote strong yeast which in turn means it can handle high alcohol concentrations which means it was last longer and do a better job on your beer.
An efficient yeast means one gets quicker fermentation times and a reduce chance of a stuck fermentation. This also will mean that you will get fewer off flavors in your beer.
The higher the desired ABV, the more oxygen required
At the same time, you are probably intending to pitch your yeast at a higher rate than you would for a 'session beer' so, all things being equal, you'll want to increase the oxygen ready to be used by that yeast.
How to aerate your wort with oxygen
Before you aerate your wort the first thing to consider is WHEN.
If you aerate when the wort is too hot (this includes being warm) there is a vastly increased change the oxygen will bind to wort particles.
If this happens, the risk is that over time these compounds will begin to break down, adding the oxygen back into the beer. The harm occurs as the oxygen can tend to oxidize the hop and alcohols.
This can produce 'off flavors' which are often described as being like 'wet or damp cardboard' or sherry like.
How to prevent oxygen from getting into your beer
We discussed above that aeration at hot temperatures is undesirable - so cooling your wort quickly is the best thing you can do.
Using a wort chiller will quickly bring your beer down to the right temperature so you can pitch your yeast but before you pitch, it's the time to oxygenate.
Carboys
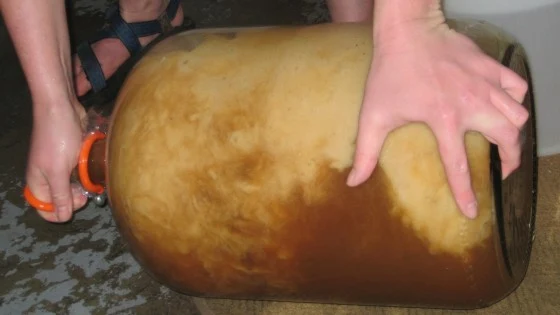
If your wort is in a glass carboy, cover the mouth of the carboy with a cap and gently rock the carboy back and forth to encourage oxygenation of the wort. You can do this with a plastic fermenter too.
Just make sure you have a firm grip!
If you're making a beer with a kit, once you have the kit in (along with hops and brew enhancer) then I fill it up with water from the garden hose. This will easily add plenty of oxygen to the wort.
Once your beer is in the fermenter and fermentation is to begin, it's pretty simple to keep the oxygen out - you need to ensure the drum or carboy is tightly sealed and that your bubble airlock / air vent has water in it.
Then try not to move it again!
When bottling your beer, a bottling wand and a steady hand will help to prevent aeration. Do not leave your filled bottles uncapped for too long either!

Other tricks for stirring in oxygen:
Then try not to move it again!
When bottling your beer, a bottling wand and a steady hand will help to prevent aeration. Do not leave your filled bottles uncapped for too long either!

Other tricks for stirring in oxygen:
- Use whisk. Get in there and use some elbow grease
- Use a beer spoon. Not as efficient as a whisk but a strong arm will make some foam
- Add an agitation rod into a drill such as this mixer.
- Use a siphon tube to spray the wort into the fermenter
Whichever agitation method s used, make sure that your implement is clean and sanitized to prevent risk of infection.
Another great method is to use a pump system for aeration. Check out this instructional video on how to configure the pump.
If using an aquarium fish style pump, you need to make sure the diffusion stone is clean and sanitized and is small enough to fit into the neck of the carboy. The stone also needs to have a small micron level of between .5 to 2 to ensure lots of gas bubbles are produced.
For best results, aerate your chilled or cool wort for 20-30 minutes.When racking beer, try not to disturb the beer too much
When you're racking to a secondary fermenter or to your fermenting bucket it's imperative to prevent the liquid from splashing or getting agitated. When using a siphon it's best to keep it smoothly flowing.
Do I have to oxygenate my beer?
No.
You do not need to proactively aerate your beer, fermentation will still occur.
The point of aeration is that you are trying to give the yeast a leg up.
That said, some brewers are known to starve the yeast of oxygen as this assists with the beer profile they desire. This process is called anaerobic fermentation.


0 comments:
Post a Comment